Wednesday, January 27, 2010

Location Portrait of Christine Allocca

I love location shoots. They are always different and challenging and this shoot was exactly that.  I showed up at Silver Spur Stables to shoot Christine Allocca, and actress and model here in L.A. Christine had cleared the location, Silver Spur Stables where she boards her horse with the owner Suzanne, a couple of days before. I arrived a little early to scout and pre light the first set up. I spoke with the owner, Suzanne and we became instant friends... "Shoot anywhere you want," she told me.

I was immediately drawn to the main row of stables. It had a really cool vibe, great textures and an awesome ceiling with really interesting slat windows with rays of light pouring through. Sweeeeetttt...

I began setting up, my main light a B1600 with a soft-box and a second light a B1600 with a strip-box. I metered everything and took some test shots, this was looking really cool! Then Suzanne came around the corner. "Oh no" She exclaimed! "You can't shoot here." Uhhhhhh, remember 45 minutes ago when you told me to "Shoot anywhere I wanted?" "Oh but I though you were just going to have the camera, you can't set up all this equipment here. We charge for that."

Ahhhhhh, I see, the old L.A. shuffle. Introduce a light stand an all of a sudden everyone wants to get paid. Now, Christine is almost out of Makeup, and I have not idea what I am going to do. A quick woo-ing of Suzanne and we got permission to set up light stand in the adjacent row of stables. It was not nearly as cool as the main row, but what could I do... Another location lighting adventure, where preproduction days aren't in the budget.

Check out this awesome behind the scenes video made by my friend, Daniel "The Beast" Rocha!


Christine Alloca Shoot from Luke Pickerill on Vimeo.

Main Light: B1600 w/Soft-box
Rim Light: B1600 w/Strip-box
Fill: On Camera 580exII


f/6.3 - 1/100th - ISO400


f/5.6- 1/40th - ISO200

After we were finished inside, the pan was for her to change wardrobe and head outside. But when I walked around the Stables there really wasn't a good spot. So, we moved down the street and decided to hop a fence and brave the roaring L.A. River. When we pulled up I noticed some really cool grass along the bank and we did out first setup. I had a 580exII on a VAL (voice-activated-light stand.) Then I threw a ND filter on my camera to not only shoot in a shallower depth of field but I also wanted to get better performance out of my 580. It was just about that time that my radio triggers went down. I didn't know what the problem was but a lot of people were waiting on me. I was freaking out quite a bit but I couldn't show that to the client. I decided to throw the 580exII on my hot show into master mode and the 580exII on my VAL into slave mode. I was hoping for the best as this system works only in line of sight infrared. Thankfully it did.


f/4.5 - 1/125th - ISO200


After that we moved into the river and under a bridge. Same setup basically 580exII on a VAL with another 580exII on camera for fill!

f/4.5 - 1/125th - ISO200

Tuesday, January 19, 2010

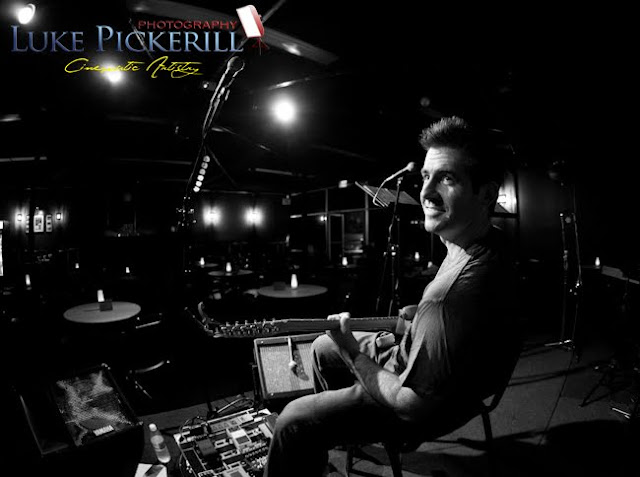
Jeremy Graham Blues

So I got a call on Sunday at 1:00pm from a friend Jeremy, Jeremy Graham Blues (a blues band) asking me if I was available to cover a show that night. I was in the middle of a gigantic filing project in my office, putting away my 2009 files and updating them for 2010. Hmmmm, continue with the filing project or make some coin at a blues show...?

I got to the show about an hour early, I wanted to see what the lighting was going to be on the stage and I also thought we might grab a quick portrait. I had been to the Venue before, a local Cafe and I knew they had a cool back room with a pool table and some funky dingy walls. The perfect place for a blues portrait.

When I got to the venue, because of the rain that dingy, awesome room where we were going to do our portrait was full of equipment. The Cafe had used that room to stack all of their equipment that would normally be outside. As per usual on location, we were going to have to adapt and we didn't have much time. With the client looking at me like "well where do you want me" my inner self is panicking "I have no idea" but we can't show that in front of the client, "Go grab a drink, we're going to get set up here, I'll come and grab you in a few minutes." Now to figure out what we are going to do.


I saw a piece of chain link fence just to the side of the stage and threw that up as a quickie backdrop.  I set up a  580ex II off camera left on a umbrella set to slave, and triggered that with a 580ex on my camera that also doubles as a fill. Then I had my wife hold another 580 gridded just behind Jeremy for a rim light. I would have liked to throw a little more light on the fence but I only brought 3 speedlights. You can still pick up a little of the texture.


 f/2.8 - 1/30 - ISO800

Then, I decided to use the available lighting on the stage to create a cool contrasty portrait of Jeremy on Stage. I knew once the room filled up I wouldn't be able to get into that same position so it seemed like a good choice. Also, I know Jeremy likes things to be a little more creative...

f/2.8 - 1/125 - ISO1600


f/2.8 - 1/60 - ISO1250

Here are a few more grabs from the show.

f/2.8 - 1/125 - ISO1600


f/2.8 - 1/125 - ISO1600

 
f/2.8 - 1/125 - ISO1600


f/2.8 - 1/125 - ISO1600


f/2.8 - 1/125 - ISO1600

Thursday, January 14, 2010

Seth & Kerry: A Blast To The Past

When Seth called me and said they wanted to do a 50's themed engagement shoot I was all about it! I love a goo concept shoot. I was especially excited for this one because I thought I might get to seriously light it!

When we talked about where this would take place they said that Kerry's place had the perfect front porch. I basically packed up all of my gear because I didn't know what the porch looked like, what direction it was facing, where the sun would be... and the equipment  doesn't do me any good back at the studio. So when I got there I was pleasantly surprised to find that the problems that normally make me yank my hair out in large clumps where not present here.

First, the sun was behind the house leaving the porch and front yard completely in shadow... "YES, I can control this!" I wanted to create a bright summer day feel with really saturated colors. So, I set up a B1600 as my key light on an umbrella just to camera left on a c-stand up high. I had to put a couple sand bags on it because we had to have it extend over the planter you see on the right in the first shot.

Then I set up a fill almost directly behind my camera position and two lights towards the back to create that sun coming in feel. It took a few minutes to figure out the shadows as the rim and key light were making double shadows on the wall. We got it all squared way and off we went.


f/11 - 1/200 - ISO200


f/5.6 - 1/125 - ISO100

 
f/5.6 - 1/125 - ISO100

Friday, January 8, 2010

Calvillo Girls

My friends the Calvillo Girls are not only fantastic, amazing (like stupid good) singers but also beautiful young girls. They recently signed a record deal with Red Zone Entertainment and I wanted to get on their radar. So I asked them if they would be willing to do a shoot with me.

Check out this behind the scenes video. A special Thanks to my Friend Daniel Rocha for putting this video together for me!

Calvillo Girls Shoot from Luke Pickerill on Vimeo.

I went to their house for a pre-production meeting, I wanted to get a better sense of the girls personalities and it didn't take long for me to figure out exactly what we were going to do. I planned on doing two setups.
1. All white environment.
2. A Gray background for compositing later.

The setups for both shots were very similar. For the Gray backdrop I set up a nine foot seamless grey paper. I used a Alien Bees B1600 for my key light camera right with a giant softbox. I used two B1600's gridded with 1/2 cuts of CTO as rim lights. I set up another B1600 over the girls head with a stripbox to light the background. I wanted this to be really contrasty so I didn't use a fill here. In fact I placed a 7 foot piece of black foam core just out of frame to the left to stop the key light from bouncing off the wall back into the frame.

We were in a really small room. These are the best productions shot I have, you can kind of see whats going on...


For the final composite I took an image of some clouds I had taken on a recent trip to Bend, Oregon. Here is the final Image: My camera settings for this shot: f/11 - 1/200 - ISO200

f/11 - 1/200 - ISO200

For the next setup I took down the Gray and replaced it with a nine foot seamless white. Now, I really wanted to lay some large sheets of plexi on the ground (to throw a little reflection up) for the girls to stand on but I couldn't fit them into my car so I made the decision before hand I would have to do it in post. Not my favorite option when shooting, I like to do as much in camera as possible but sometimes (especially with $0.00 budget you gotta do what you gotta do).
 
Key Light:
One I had the backdrop in place I left my Key light almost exactly where it was Just over camera left. I had originally wanted to reposition it to the other side of the room but the day was getting late and I didn't want to loose the energy of the girls by having them sit around for a long time. Since I already knew the correct f-stop I started on my background.

Background:

when shooting in an all white environment you want your backdrop to be 1 to 1.5 stops brighter than your key.  I started by setting up two 7 foot pieces of foam core scored down the middle and forming a 90° angle standing straight up on either side of the girls. I set a B1600 inside each of these. I set my light inside here to avoid spill onto my subjects. You can see them from the image to the right! I used the black side because when I flipped them around to the white side I was getting a lot of fill on the girl on the left while not getting very much on the girl on the right. So I used the black side and brought in a fill light just behind camera on the left.

My camera settings for this shot were f/13 - 1/200 - ISO200
Here is a couple of the final images:


 f/13 - 1/200 - ISO200


 f/13 - 1/200 - ISO200


f/13 - 1/200 - ISO200

Monday, January 4, 2010

Corina and Martin -Engagement Shoot

In my first consultation with Corina she told me the story of her and Martins proposal. How they love to hike and how at the top of their favorite hill overlooking the city she grew up Martin got down on one knee and said those special words,"Will you marry me."


As we talked about ideas for her engagement shoot she said that they would love to do it on that hill. When I asked her how difficult the hike was she just said "It's up..." I work out so I figured what the heck. Halfway "up" and I was wondering what I had gotten myself into. I was carrying a camera backpack with 40lbs of cameras and lenses a Quantum Flash with a Turbo 2x2 battery pack mounted to a heavy duty light stand in my hand (oh yeah Martin was carrying a backpack full of reflectors and misc gear.)

As we stopped just short of the top for our first shot it took me several minutes just to catch my breath. They must have though I was crazy!


 f/4.0 - 1/125 - ISO400


 f/4.0 - 1/125 - ISO400


 f/5.0 - 1/250 - ISO100

  f/7.1 - 1/200 - ISO100


 f/2.8 - 1/200 - ISO400 

 f/2.8 - 1/200 - ISO400 


 f/4.0 - 1/125 - ISO400


 f/4.0 - 1/200 - ISO400
  
 
 f/2.2 - 1/100 - ISO1250

 
 f/1.8 - 1/160 - ISO1250

 
 f/2.8 - 1/100 - ISO800  

Handheld HDR at The Getty Villa

I have been hearing a lot about hand held HDR lately. The iphone has an HDR app, it seems to be everywhere these days. I have been a big fan of HDR for several years now but have never even thought to try it hand held. If you have never heard of HDR click here for a full description. A recent trip to the "Getty Villa" Museum proved to be the perfect testing ground. I though that if this worked it would be a great technique to stuff into my wedding bag. So I set my camera to auto bracket -2 and +2 stops, waited until as many people were standing still as possible and well... I think I need more practice!

I used Photoshop and HDRsoft "photomatix" plug-in


f/7.1 - 1/125 - ISO400 (+-2)


f/10 - 1/200 - ISO200 (+-2)

Saturday, January 2, 2010

Welcome

Welcome to Luke Pickerill Photography's Blog. Thanks for stopping bye. My goal for this blog is to not only keep you up to date with all of the things we are doing around here but I also plan on sharing some of the techniques and methods I have used along the way. See you again soon!